
As summer draws to a close, I've been gathering flowers from my flower garden and pressing them to use in craft projects. This will give me something to craft with once our autumn rains return and I'm stuck indoors!
Pressing flowers is a great way to preserve them to use later in projects, especially if they're flowers from a memorable event such as a wedding or a birthday bouquet. They can be framed, put into pendants, or used to embellish handmade cards.
A wooden flower press makes this task easy, but I ran out of room quickly. If you don't have a flower press, heavy books will work just fine.
What you'll need:
Flowers
A flower press, or some plain paper and a few heavy books.
You can press the flowers between sheets of paper in the book, but some color and moisture from the flowers may seep through the paper, so it's best to use old books for this. An alternative would be to place the paper on top of a book, layer the flowers, add another sheet of paper, and stack a heavy book on top.
What kinds of flowers can be pressed?
Flowers that are naturally flat (such as pansies) or have wide-open blossoms work best. Large three-dimensional flowers (such as roses) are better preserved by drying upside down or using other methods. Thicker flowers can still be pressed, but may take longer.
It's best to pick the flowers shortly after they bloom. If they're wet, let them dry before pressing.

Arrange the flowers in your flower press (or between sheets of paper), allowing some space between them. Add a second sheet of paper or tighten the screws in the flower press once finished.
Check on the flowers after about a week. They'll lose some of their color naturally, but pressing them too long can make them turn brown. If they seem dry, you can take them out of the press and start using them.

It's best to sort the flowers based on thickness and press flowers of similar thickness together. I made the mistake of pressing thin pansies with thicker flowers - as you can see, they ended up folded and smashed because the thickness of the other flowers prevented them from being pressed neatly in their original shapes.


For flowers too large to be pressed, try removing some of the petals or smaller portions of the flower. These hydrangea petals take on a new look when separated from their large cluster of blooms. Arranging flowers in a frame would be a nice way to display flowers from a special occasion.

Grasses also look beautiful pressed. These are some interesting grasses I collected on a vacation to Idaho. Thick grasses won't become perfectly flat, but these would still be suitable for displaying in a glass frame.


When pressing thicker flowers like asters, make sure to have all the petals straight before pressing or they'll end up crooked or bent.

Pressed flowers can be stored in a box between stiff pieces of cardboard and will last for years if stored away from heat and moisture.

These are pansies my mom picked from her garden and pressed over 20 years ago!

This pressed flower bookmark is easy to make, just place your pressed flower between laminating sheets and run them through a laminating machine. You can cut a straight bookmark shape, or around the natural curves of the flowers as shown here. Punch a hole at the top and add a piece of raffia or ribbon for a final touch.

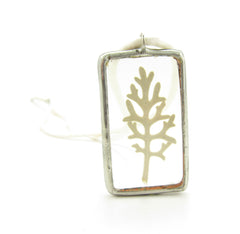
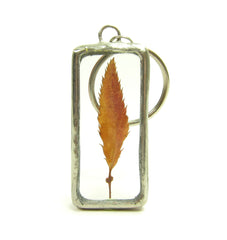
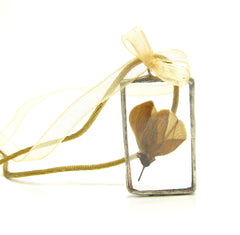
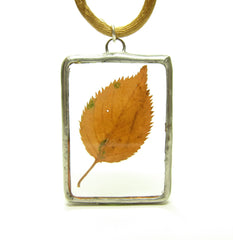
Don't limit yourself to just flowers - this technique also works great for fall leaves! Here are a few items from our soldered glass jewelry collection that use pressed flowers and leaves. If jewelry isn't your thing, a keychain is also a great way to show off a beautiful leaf or flower.


Comments